Display Conditions
This example shows how to render dynamic content to a landing page or an email using display conditions.
Display conditions allow your users to change the content shown to recipients of an email based on different conditions.
You can start by initializing the editor for an email:
unlayer.init({
  id: 'editor',
  projectId: <<your_projectId_here>>,
  templateId: <<your_ templateId_here>>,
  displayMode: 'email',
});
For this example, we are using a template advertising a sale for an e-commerce business. As you can see that there are individual rows for the men, women, and kids category. To be specific to our target audience, we want to render content based on the email recipients using display conditions. Let's write the code for it:
unlayer.setDisplayConditions([
  {
    type: 'Customer Category',
    label: 'Women',
    description: 'All women customers',
    before: '{{#iswomen}}',
    after: '{{/iswomen}}',
  },
  {
    type: 'Customer Category',
    label: 'Men',
    description: 'All men customers',
    before: '{{#ismen}}',
    after: '{{/ismen}}',
  },
  {
    type: 'Customer Category',
    label: 'Children',
    description: 'All children customers',
    before: '{{#ischild}}',
    after: '{{/ischild}}',
  },
]);
Here is the descriptions of all the required attributes for a display condition:
| type | This is a category to combine multiple conditions into different folders. If there are conditions with different types, the user will select the type first. |
|---|---|
| label | This is the name of the condition that the user will see. |
| description | This is the description of the condition that the user will see. |
| before | This is opening syntax for the condition added before the selected row. |
| after | This is the closing syntax for the condition that will be added after the selected row. |
Note: The conditions next to the
beforeandafterattributes are written using the Mustache template engine for this particular example. As Unlayer editor supports all template engines, you can choose any template engine for your implementation.
Here's how you will set display conditions for your template using the editor. Click on the row that you want to apply the display condition to. You will be able to see the following on the side panel:
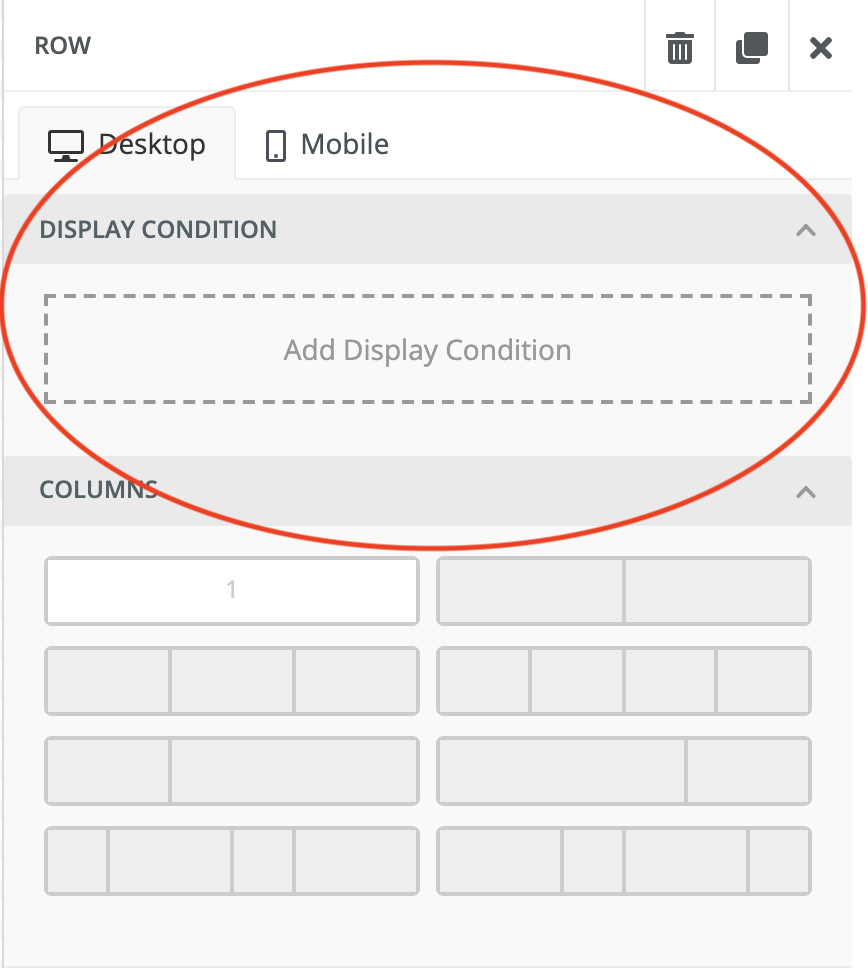
If you click on "Add Display Condition", then you'll be able to view the following:
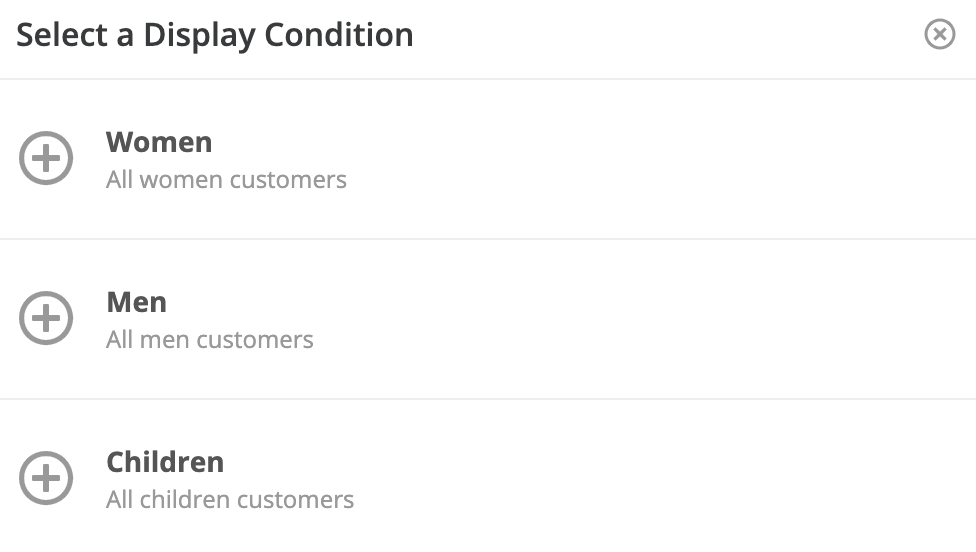
These are the display conditions that you have specified in your init code. You can apply whichever you want to your row. Now once the display conditions are set, it's time to see how they will look on the preview. Let's override the default behavior of the previewHTML to render the template based on the date we send. This is how you can do that in Mustache:
unlayer.registerCallback('previewHtml', function (params, done) {
  var category = prompt(
    'Please enter your category. Men or Women or Children:',
    'Men',
  );

  if (category == null || category == '') {
    console.log('User cancelled the prompt.');
  }

  var data = {
    ismen: (category == 'men') | (category == 'Men'),
    iswomen: (category == 'women') | (category == 'Women'),
    ischild: (category == 'children') | (category == 'Children'),
  };

  let result = window.Mustache.render(params.html, data);

  done({
    html: result, // you can pass your custom html here
  });
});
Here's a live preview of the editor where display conditions have been set. You can apply them to rows and then preview the template to see how they work:
Hurray, it's working!
Now let's try exploring another callback provided with display conditions.
unlayer.registerCallback('displayCondition', function (data, done) {
  // data - current display condition
  // done - callback function

  // Open custom UI for display conditions here
  // Once your user is done creating a condition, call the "done"
  // callback function with the new condition.

  done({
    type: 'Customer Category',
    label: 'Adults',
    description: 'All customers who are adult men and women',
    before: '{{#isadult}}',
    after: '{{/isadult}}',
  });
});
You can extend this feature and build your Display Conditions Custom UI. For example, you can open a custom modal and show any interface to pick or create display conditions. Here is an example:
Click on the "Add Display Condition" and create a display condition with the following attributes:
- type: 'Customer Category'
- label: 'Adults'
- description: 'All customers who are adult men and women'
- before: '{{#isadult}}'
- after: '{{/isadult}}'
Apply it to the Men and Female sections. When you'll enter "children" on the prompt after press the Preview button, the Men and the Female sections will not be visible to you.