Merge Tag Loops
This example shows how to render a dynamic list of products using the Merge Tags Loops feature.

Let's suppose you have an e-commerce website where you want your users to create an order confirmation template that lists all the ordered products.
Define the merge tags configuration during the editor initialization, or using the unlayer.setMergeTags method (Learn More):
unlayer.init({
  id: 'editor',
  displayMode: 'web',
  mergeTags: {
    title: {
      name: 'List Title',
      value: '{{title}}',
      sample: 'All Products',
    },
    products: {
      name: 'Products',
      mergeTags: {
        name: {
          name: 'Product Name',
          value: '{{name}}',
        },
        price: {
          name: 'Price',
          value: '{{price}}',
        },
      },
      rules: {
        list: {
          name: 'Repeat for Each Product',
          before: '{{#products}}',
          after: '{{/products}}',
          sample: [
            {
              name: 'Product 1',
              price: '$1.99',
            },
            {
              name: 'Product 2',
              price: '$2.99',
            },
            {
              name: 'Product 3',
              price: '$3.99',
            },
          ],
        },
      },
    },
  },
});
You can see two types of merge tags defined in the code snippet above:
titleproducts
title is a simple merge tag, with their name and value defined. The sample field is showed in the Preview modal, but not exported.
The products merge tag uses our list rule to indicate we are dealing with a list of items (this can be called whatever you want). The before and after fields will be applied around the code block to be repeated (this can also be whatever you want).
Here is a live playground of the editor:
You can play with merge tags in the editor provided above.
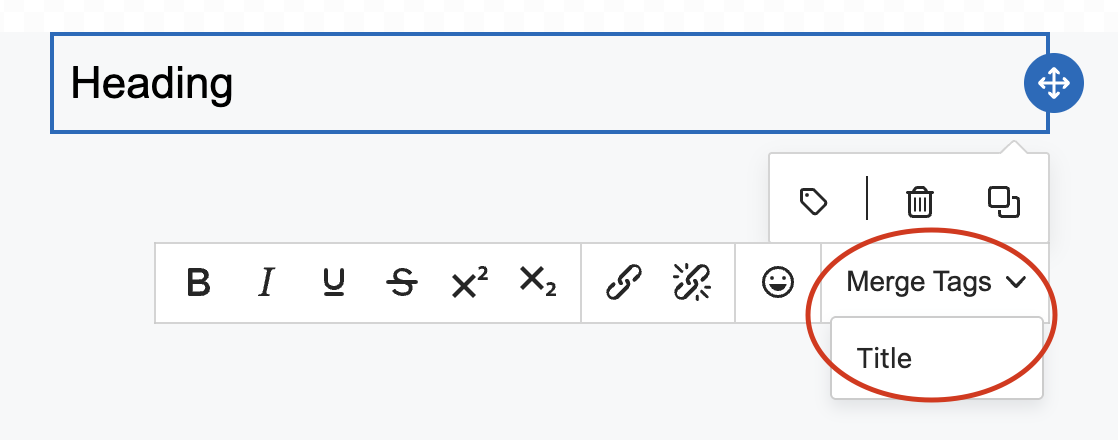
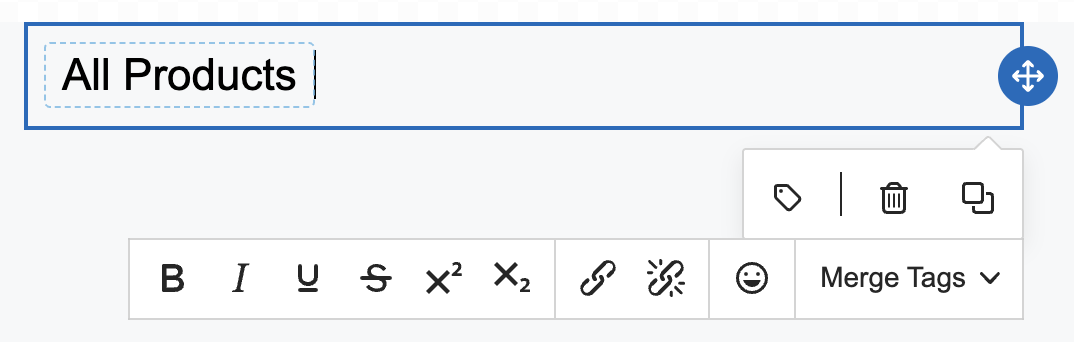
Drag a heading tool into the editor, select it and a toolbar will show up. If you click on Merge tags, you can see List Title in the drop-down menu. Click on it to add the Merge Tag to the template:
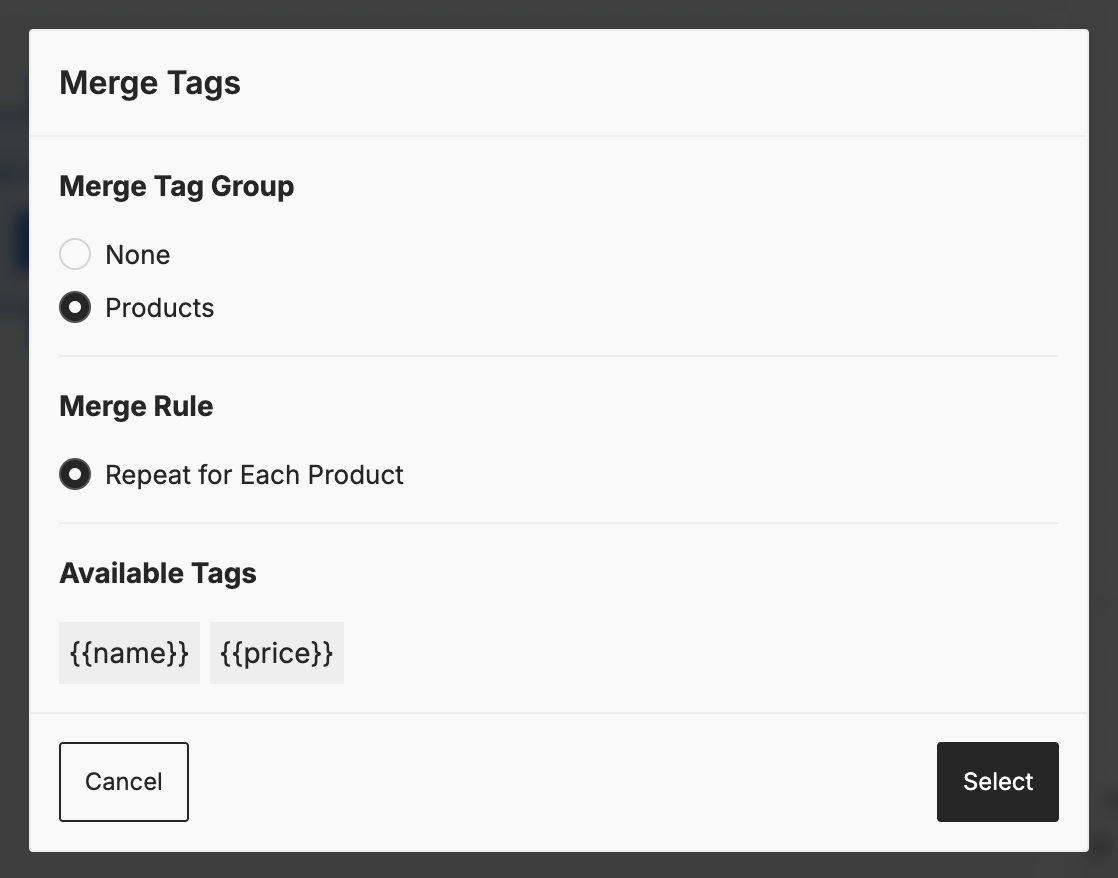
Drag a new row (Columns tool), and click on the Merge Tags icon inside the row toolbar:
![]()
A dialog will open. You can then select Products in the Merge Tag Group category and Repeat for Each Product as your Merge Rule:
The row is now prepared to support our product Merge Tags, and its exported html will be repeated for each product.
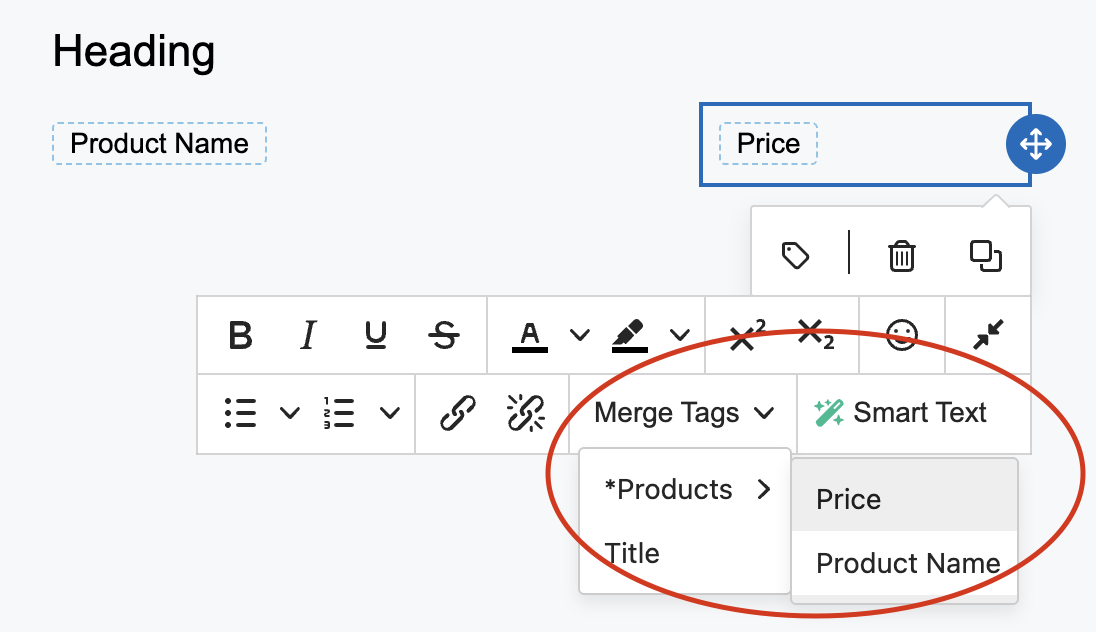
Drag more Text tools and add the Products Merge Tags to them:
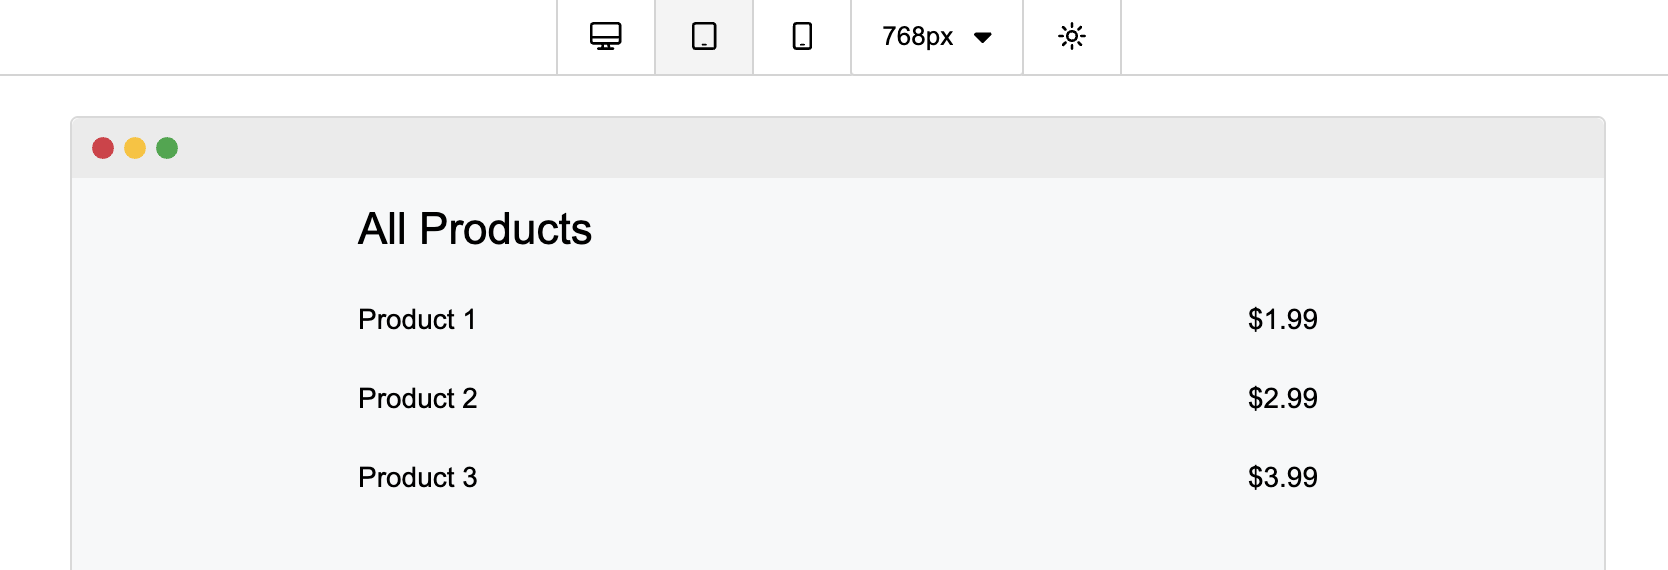
Now that you have set up your merge tags, you can go to the preview mode to view them by clicking on the eye icon:

Here's a preview of the exported html using the sample data provided in the initial configuration:
To export the HTML with the final merge tags values, you can pass the mergeTags option using the following syntax:
unlayer.exportHtml(
  function (result) {
    console.log(result);
  },
  {
    mergeTags: {
      title: 'My Exported Products',
      products: {
        list: [
          {
            name: 'Exported Product 1',
            price: '$1.99',
          },
          {
            name: 'Exported Product 2',
            price: '$2.99',
          },
          {
            name: 'Exported Product 3',
            price: '$3.99',
          },
        ],
      },
    },
  },
);